-
Use Cases
-
Resources
-
Pricing
How to Create a Timeline in Word: Step by Step (with Pictures)
By Matt Mazur · Last updated March 3, 2022

We get it:
You want to create a timeline, but you don’t know how.
In this tutorial, we’re going to show you exactly how to make a timeline in Word, one of the most popular text editing applications around.
Step 1: Make a Basic Timeline to Start
First thing’s first:
Change your page orientation from portrait mode to landscape mode. This will give you more room to create your timeline (assuming you’re making a horizontal timeline).
You can find the page orientation option by going to Layout > Orientation and choose “Landscape”, like so:

Next, select the Insert tab and click on SmartArt under the Illustrations section:

Under the Process category, you’ll see an array of different options to choose from. Each one has a slightly different design, but they all pretty much function the same.
In this tutorial, we’re going to be using a basic timeline.

Step 2: Add Your Timeline Events
Now that you have a basic timeline template in your doc, it’s time to add your timeline events.
You can click on each one in the template, but it’s much easier to edit them by opening the Text Pane.
In the middle-left section of the timeline, you’ll see an arrow. Click on it to open the Text Pane:

You can add your events to each portion of the timeline here.
If you want to add more events, simply press enter at the end of the last event.
A new event will be created and the timeline will automatically update.
It’s important to note, however, that the more events you add, the smaller your text will become.
Adding more than 7 events is going to make your timeline events hard to read.
If you have a lot of events to add to your timeline, you should probably use a dedicated timeline software instead.
In addition, if you wish to add the date or time of the event below the text, you can press Shift + Enter to create a line break (the same is true if you wish to add the date above as well.)
Warning: Word does not automatically calculate the time between intervals. This means each event will be the same distance apart from one another, regardless of when they took place. If you want to use a free online tool meant specifically for timelines (that also allows you to export them), check out Preceden timeline maker. You’ll be able to create proper timelines with ease.
Now that you have created a standard timeline, it’s time to make it your own. Word conveniently allows you to customize your timeline by changing its color and style.
Moreover, you can even customize individual events.
Let’s find out how:
Step 3: Customize Your Timeline
Navigate to the Change Colors dropdown menu that can be found in the SmartArt Design tab:

FYI, your timeline needs to be selected for this tab to appear.
You can also change the overall look of your timeline by changing the style in the SmartArt Style section.
Next, you can customize individual events by right-clicking on the event and selecting your changes from the menu that appears:

You can change the font color, the event shape fill, and the outline color as well. You can even adjust the size/location of each shape to help distinguish one event from another.
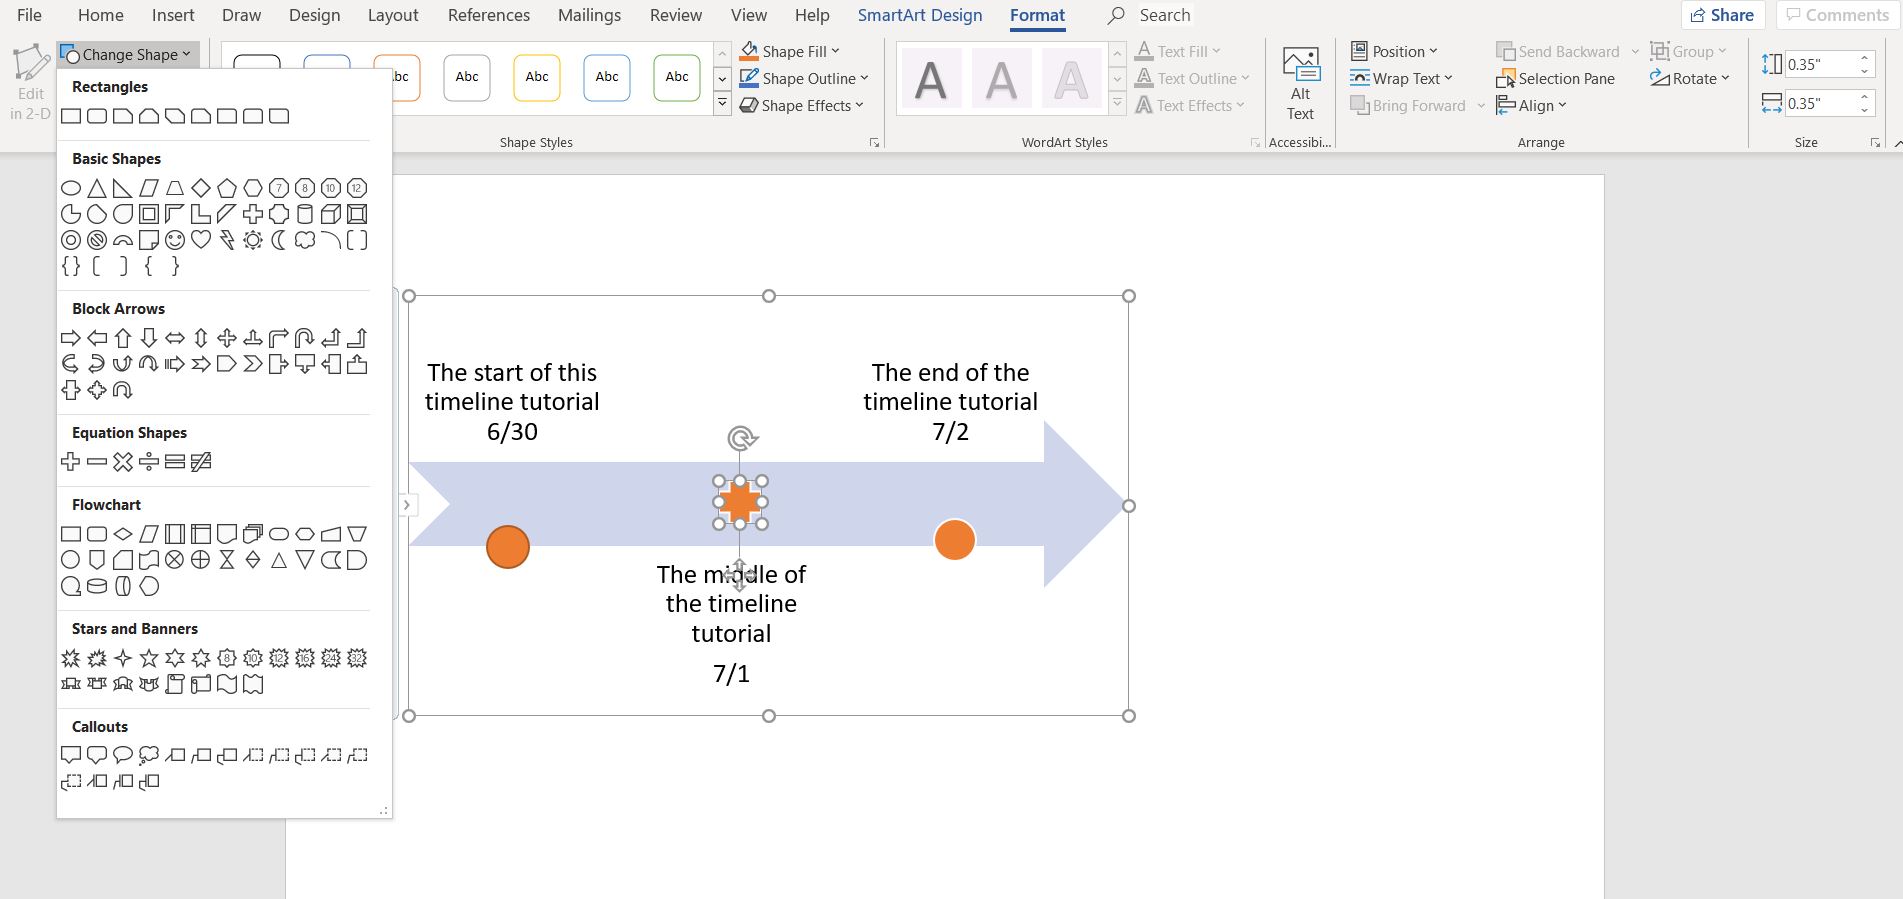
Use the Shapes section in the SmartArt window to resize your shapes, or change them entirely:
That’s pretty much it!
Now you know everything you need to make, edit, and customize a timeline in Word.
Timeline Templates
If you don’t want to spend time manually creating and styling your timeline in Word, you can always use a timeline template.
Plenty of people before you have created timelines, and the nice ones have made it easier for the rest of us.
Template.net has a ton of templates to choose from, including some that are compatible with Microsoft Word.
Should You Make a Timeline in Word?
Assuming you only need to create a basic timeline with a few events, making a timeline in Word is a great option. This is especially the case if the rest of your report is also being written in Word.
On the other hand, if you want to make a more elaborate timeline with many events and adjustment options, using another tool is probably your best bet.
Microsoft Word’s timeline creation tools are somewhat limited compared to other options, including Preceden.
With Preceden, you can make professional timelines in minutes for any project – work, school, or otherwise, Preceden makes it easy to create timelines.