-
Use Cases
-
Resources
-
Pricing
How to Create a Timeline in Google Slides [Easiest Method]
By Matt Mazur · Last updated March 3, 2022

Google Slides is a cloud-based (and free) alternative to PowerPoint, and it has become incredibly popular.
Believe it or not, you can actually use Google Slides to create a timeline, right in your presentation.
Of course, your timelines would be more intricate and professional if you used a dedicated timeline software, but you can definitely make a basic timeline for your presentation.
In this tutorial, we’re going to teach you how to make a timeline in Google Slides the easy way.
Oh, and did we mention it’s absolutely free as well?
Let’s get started!
Inserting a Basic Timeline Template
Google Slides has a variety of diagrams that you can insert in your presentation, including timeline templates.
To begin, navigate to Insert > Diagram…

Next, you’ll be prompted to select which diagram you want. Choose Timeline from the list of options:
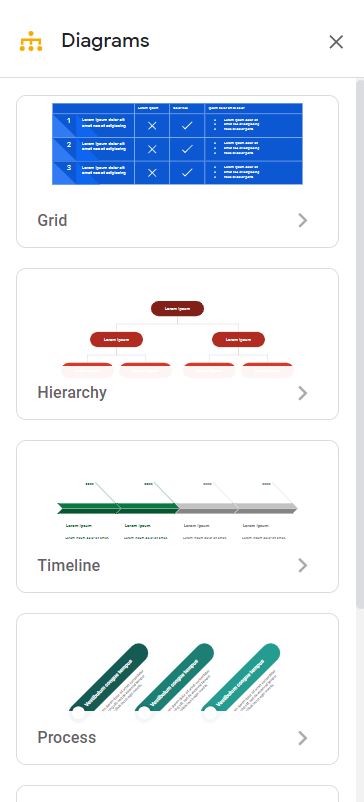
After selecting the timeline option, you’ll be presented with a whole host of different timeline styles to choose from.
You can have 4 to 6 events in your timeline, and you can pick which color you’d like your timeline to be:

Now you’ll have a timeline template in your slide, ready for you to customize it to your liking:

It’s important to note, however, that you’re limited to a maximum of 6 timeline events when creating a timeline with Google sheets.
If you want to create a professional timeline in minutes that allows you to add as many events as you want, check out Preceden online timeline maker.
It’s free to sign up, and it’s super easy to use.
Customizing Your Timeline
Anyway, from this stage of the game, it’s time to start adding timeline events.
You can click on any of the timeline elements to make changes:

Each text box can be edited, moved, resized, and changed as you wish. You can also change the position of the main timeline itself:
As you can see here, I’ve changed the font size, position, and color of the year in the first event, as well as the position of the main timeline elements:

Using Slides’ ability to insert images, you can add pictures to your timeline as well.
Either copy/paste the image into your timeline presentation, or you can insert the image.
Click the image icon in the toolbar, or click Insert > Image to add as many images as you’d like to your timeline.

If you have any videos to add to the timeline, you can also do that by going to Insert > Video.
Is Google Slides The Best Way to Make a Timeline?
Creating timelines with Google Slides is pretty straightforward. The nice thing about Google Slides is that it's lightweight, easy to use, and you can use it for free as long as you have an internet connection. You don't need to build a powerful computer to use Google Slides.
Unfortunately, the process is tedious and worst of all, you’re limited to 6 timeline events.
Using this approach is great for simple timelines, but if you want to make something professional (quickly) without much effort, it would be in your best interest to use a dedicated timeline maker like Preceden.
Sure, you can use tools and plug-ins like LucidChart to make a timeline in Google Docs, but these tools weren’t designed specifically for timeline creation.
With Preceden, you can create stunning timelines with ease for free online.
There are tons of customization options, and you can add layers to your timelines to make them even more organized.
Check it out:
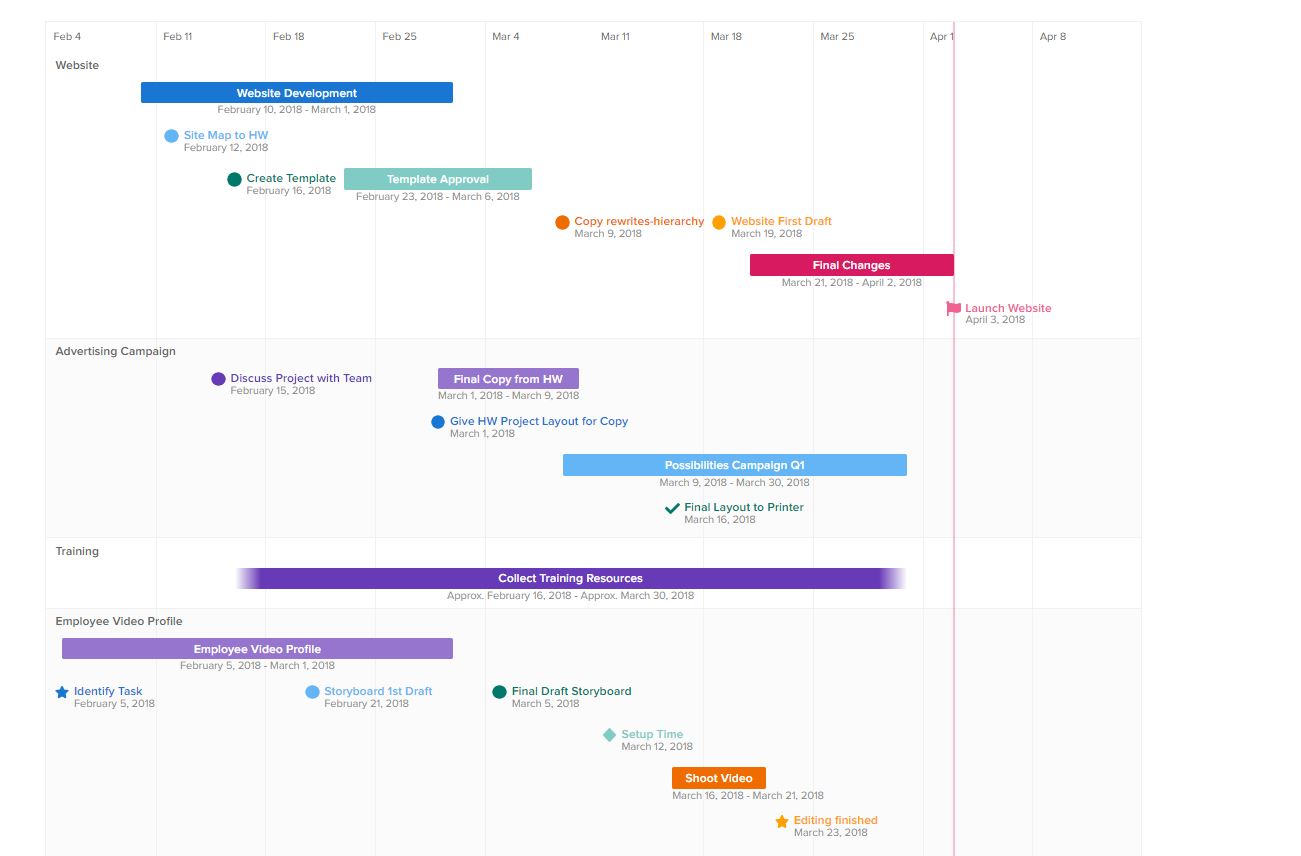
Best of all, Preceden allows you to easily export your timelines so they can be printed, embedded, or even added to your Google Slides presentation.
Create your first timeline for free today!